OptiMonk product lessons course
Learn the ins and outs of the most imortant OptiMonk features.
Learn the ins and outs of the most imortant OptiMonk features.
Hey there and welcome to the OptiMonk Product Lessons Academy course!
This course is designed to give you a deeper understanding of OptiMonk’s capabilities and give you ideas on how you can use them to make your campaigns more successful.
So, if you already have a basic understanding of how OptiMonk can be helpful for your business and ready to truly maximize your account’s potential, this course is for you. In case you wish to master a single feature only, this is where you can do that, as well. Feel free to jump around between lessons in this course!
Ready to explore all the things that OptiMonk will allow you to do? Let’s dive in!
Hello everyone, this is Kate and I’m excited to show you a feature that makes audience management simple for both beginners and advanced users with complex targeting rules.
Meet OptiMonk Segments!
OptiMonk has countless targeting options that empower you to dissect your website traffic into smaller visitor segments. If you’re an online seller, these segments could be “Active visitors,” “Returning visitors” and “Just Purchased visitors”. But if you also build email or SMS lists, you might want to focus on “Non-subscribers” or “New home page visitors.”
These segments can be defined by a specific set of targeting rules that – let’s be honest – might be intimidating for less-experienced users.
But not anymore! The OptiMonk Segments feature makes targeting different segments incredibly simple, yet very powerful.
How? Here are 3 things you’ll love about this feature:
#1 Choose from pre-defined segments
Every time you create a new campaign from a template, you can choose from pre-defined segments that are recommended specifically for your campaign goal. In other words, you don’t have to take a deep dive into targeting rules if you don’t want to, selecting the right segment has become incredibly straightforward.
#2 Save and re-use custom segments
You can now save any set of targeting rules as a Custom Segment and re-use it in your future campaigns. This comes very handy if it makes sense to divide your traffic into further segments such as New Visitors from the US / from Canada / from the EU etc. If you happen to use the same targeting settings in several campaigns, this feature will save you a ton of time.
#3 Load a set of targeting rules from any previous campaigns
What happens if you’d like to use the targeting rules of an old campaign without having saved it as a custom segment previously? There’s no reason to worry. You can still save yourself some manual labor by loading the settings of any campaign you have created previously.
That’s all you need to know to target your campaigns like a pro.
If you’re just as excited about this new feature as I am, give it a try now.
Thanks for watching, and don’t forget to like, share, and subscribe for more videos.
See you next time!
Cart abandonment rate: three words all online store owners fear. How’s the rate? It is higher than the industry average? How can I improve it? If you’re also wondering how to improve your cart abandonment rate as fast as possible without harming your visitors’ onsite experience, look no further.
Hi, I’m Réka, and in this lesson of OptiMonk Academy, I’ll show you how to master Cart rules in OptiMonk.
By now, you may have come across our motto: your onsite messages will be successful only if you display them at the right place and time, to the right audience.
So, how can you make sure your timing is right when it comes to cart abandonment? OptiMonk’s cart rules.
They ensure that only visitors with specific cart content will see your campaign.
Let’s look at how you can use this rule to your advantage. You can set up cart rules based on the cart value, the total number of products in the cart, and the number of product types. But you can also filter by the products in the cart: you may want to set up rules for when a specific product is IN the cart, when all selected products are added to the cart, or when NONE of these products are added.
And just as you might see with other targeting rules, you’ll be able to combine multiple rules together. This gives you tons of flexibility.
On the most basic level, you can use cart rules to divide your audience into two groups: those who have something in their cart and those whose cart is empty. There are a couple of ways you can set this up, but the easiest is the default setting that we have here: Visitors will see your campaign if the cart value is greater than 0.
This condition works by default with platforms that we integrate with directly: Shopify, Woocommerce, WordPress, Magento, and Shoprenter.
For any other platform or custom-built websites, you’ll need to add your own JavaScript code for OptiMonk to be able to access cart contents.
Using cart rules with cart abandonment campaigns is truly a must. I can’t recommend it highly enough.
I hope this video has helped you, and get ready for your cart abandonment rate to take a nose dive thanks to your cart rules-powered campaigns!
Good luck and don’t forget to like, subscribe and share it with your friends and co-workers!
Take care!
Have you ever wondered how you can display your campaign not only to the right people at the right time, but also in the right place as well?
The success of your campaign doesn’t just depend on good design and an enticing message… when and where your audience sees it also matters!
Hi, I’m Réka and in this video, I’m going to show you how you can pinpoint the exact location where your will campaigns appear using the “current page/URL” rule.
This targeting option is one of the most popular ones among OptiMonk users and with good reason. Using the “Current page/URL” rule, you can determine where your campaign can or can’t appear. Let’s see how you can set it up.
Here’s a simple example: you’ve already created a campaign that you want to show exclusively on your blog. How can you accomplish that with this rule?
Find the current page URL rule among the targeting rules. Once you have it, under settings you’ll be able to define conditions based on the URL. Since a blog page can have multiple subpages, I’m going to use the ‘contains’ parameter and then write ‘blog’ in the input field. With these settings, my campaign will only appear if the URL contains the word ‘blog’.
It’s quite easy, isn’t it?
Let’s see another example. Imagine you want to exclude one of your pages, so the campaign will never appear on that specific page. Let’s say that the campaign has a discount code on it and you want to avoid showing it after purchase on the thank you page. To achieve this, I’m going to select ‘doesn’t equal’ and then type in thank_you. It’s a no-brainer!
As you see, these were all simple pages but if you have a Shopify store, you’re in luck, because you can easily target collection pages and product pages, too.
I hope with this short video I was able to show you the power of this feature and how much you can do with it!
What’s your go to method to make your sales pages feel like they’re talking to your visitor personally? Does it work for all visitors or only for a sub-segment? If you’re on the hunt for a simple yet effective solution, look no further.
Hi, Kate here. In this video, I’m going to show you how OptiMonk’s Dynamic Content campaigns allow you to change any text on your landing page for different audiences. Want to show a more relevant message to a specific subsegment? Tailor your headlines and CTA buttons for them with our easy-to-use Editor! Say good bye to duplicating pages!
But first, three reasons why you need to personalize the content of your sales pages:
By echoing the messaging from the specific ads that drove visitors to your website, you can increase conversions in a sustainable way without spending more on ads.
Personalized content will help you build trust and optimize each customer’s lifetime value.
Sounds promising, right? Let’s see how you can implement it in 3 simple steps with OptiMonk.
First, select Dynamic Content as your campaign type when you create a new campaign.
Second, type in the domain you want to make the changes on.
Third, you’ll see that your page opened up in our Dynamic Content Editor.
Next, select Navigation mode to find the page you’d like to make edits to, then click on Selection mode.
Now you’ll be able to select any text element on this page and create a different version of it. You can make up to 20 changes on a page, and they’ll all be listed above under Changes.
Once you’re done making changes, move on to targeting. If you want to target multiple similar pages (like product pages in a given category), you’ll have to add them now as a targeting rule. For that you can use the current page/URL rule.
Let’s say we want to show a different headline here to visitors who are browsing bracelet product pages. We’ve created the changes on a single product page, but we’ll want to target all similar pages. For that we’ll use the current page rule the following way. We want show our changes an all pages that contain “bracelet” in the URL.
To narrow your audience even further down, you can add additional targeting rules like subscribers / non-subscribers, returning or new visitors or source-based targeting.
So let’s see a couple of actionable examples that you can use Dynamic Content for:
Personalize headlines to match ad copy
Greet returning visitors or subscribers differently
Personalize headlines based on geo-location
Show different messages based on any data
I hope that leaves you with plenty of food for thought and that you’ll close this video and start experimenting with Dynamic Content right now! 🙂
Are you looking to take your sales page conversion to the next level? If your current methods, like running A/B tests for images and copy or displaying social proof, have reached their limits and are challenging to scale, then Dynamic Content is the game-changer you need.
With Dynamic Content, you have the power to:
– Create unique experiences for each visitor without the need for multiple landing pages.
– Easily scale A/B tests without any constraints from your website framework.
– Most importantly, skyrocket your landing page conversions like never before.
Hello, I’m Kata, and in this video, I’ll demonstrate how OptiMonk’s Dynamic Content campaigns empower you to create personalized versions of your landing pages using our visual Editor, all without any coding.
To access Dynamic Content, simply choose it as your campaign type when launching a new campaign, and then provide the domain or specific URL where you want to make the changes.
Once inside the visual Editor, you can effortlessly switch between Edit and Navigation modes. If you’re not currently on the page you want to edit, simply select Navigate from the navigation bar and go to the desired page.
Let’s explore the capabilities of Dynamic Content for modifying your landing pages.
First and foremost, you can change any text on your landing page to cater to different audience segments. For instance, let’s say you want to display a distinct headline for visitors who have seen a specific ad.
With Dynamic Content, you can effortlessly switch out the headline exclusively for them. By selecting any text element on the page, you can create different versions of it. You can make up to 20 changes on a single page, and all of them will be listed under the Changes section.
Moreover, you have the ability to customize the text on your call-to-action (CTA) buttons, ensuring they resonate more effectively with specific audience segments.
With just a click of a button, you can also hide any element on the page. This feature is incredibly useful when you want to hide a CTA button or a menu item for a particular segment.
If you’re up for more substantial changes and are comfortable with a little bit of code, you can edit the HTML code of your site. This option allows you to make in-line edits to your page, such as rearranging elements or changing styling like fonts and colors. The possibilities are endless.
Now, what can you expect from these changes?
Based on our own research, personalizing your headlines alone can increase your ad ROI by 10-20%.
And when you combine it with A/B testing other elements on your product page, your conversion rate will soar even higher.
Don’t worry about guesswork—our detailed Campaign Analytics will provide you with concrete data. Simply compare the performance metrics of your different campaigns or campaign variants to identify the one that brings in the most conversions.
Now, let’s dive into a few actionable examples of how you can leverage Dynamic Content:
1. Personalize headlines to align with your ad copy.
2. Greet returning visitors or subscribers in a unique way.
3. Customize headlines based on geo-location for a more targeted approach.
4. Display different messages based on specific data points.
I hope these examples have sparked your imagination for personalizing your landing pages. It’s time to start experimenting with Dynamic Content and unlock its incredible potential right now!
What’s going on everybody? I’m Kate and in this video, I’ll be introducing you to a feature that’s gonna be your golden ticket to website personalization: Embedded Content.
Personalization goes way beyond addressing subscribers by name in your emails or website messages. Shoppers expect the entire website and shopping experience to speak directly to them. Still, many marketers shy away from delivering personalized messages because they believe it’s difficult to achieve.
Luckily, offering a unique experience to every single visitor who’s browsing your website does not have to be complicated or involve coding. In fact, it can be done very simply by any marketer with the help of OptiMonk.
Let me show you how.
You can get started with one of our Embedded Content templates. You have endless options to customize them to match your brand and website so it will look like an organic part of it. You can drag & drop any element based on the goal of your campaign such as:
There, we’ve got a handsome-looking embedded content campaign and it took me no time to create.
Now let’s have a look at 3 ways you could use embedded content, just in case you need some inspiration on how to personalize the shopping experience of your visitors.
Now you may ask: how worried should you be about page speed and flickering?
The short answer is: not worried at all. Embedded content does not only load incredibly fast thanks to a complete rewrite of code, but it also does not flicker thanks to the advanced architecture, making it seem like as an organic part of your site.
What’s more, you also do not have to compromise on website performance. Embedded content is optimized to maximize page speed.
Ready to create your own?
Start from any of our pre-built templates and you’ll have your Embedded content campaign up and running in no time!
When it comes to on-site messages, the era of the one-size-fits-all approach is officially over. Customers expect highly-relevant experiences everywhere online, but living up to these expectations can be tough if you’re not, let’s say, Amazon, and your resources are somewhat limited.
What’s going on everybody? I’m Kate and in this video, I’ll be showing you how to show a highly relevant message to each of your visitor segments within the same campaign in OptiMonk. This is undoubtedly one of the most powerful features of OptiMonk, so let’s get right down to it.
As a marketer, you’re probably used to creating different customer journeys for different segments: creating multiple versions of the same landing page or ad with different headlines. This usually means having to craft all those versions one by one, which – let’s be honest – can be quite painful.
So we had an idea: What if you could have a single campaign that provided a different experience for each segment?
This is exactly what Experiences is for.
When you create an Experience within OptiMonk, you have the option to micro-target different versions of messages to different segments within the same campaign.
Let’s say you have a simple message, such as **“**Welcome to our store”.
But you’d like to show a different version of this message to returning visitors, adding a personal touch by greeting them with their name: Welcome back, Jane.
Experiences will allow you pick some targeting rules – new vs. returning visitors ****in this case – and apply them on the message variant level, allowing you to precisely target a sub-segment of visitors.
Let’s look at just a couple examples of the flexibility you have within a single campaign with Experiences:
One thing to keep in mind:
OptiMonk differentiates campaign-level and experience-level targeting rules. Be careful what targeting rules you pick for the experience-level.
Campaign-level targeting rules will be applied to all Experiences within that campaign. Whereas experience-level rules will be the main differentiators that determine which message different segments will see. For example, the country rule if you want to offer free shipping based on country.
That’s all you need to know to create awesome Experiences in OptiMonk. Happy experimenting!
Have you ever wondered what would happen if you stopped all your onsite messages? How do you know what type of campaign works best for your audience? You can now find it out – and much more – with OptiMonk Experiments.
Hey, I’m Kate and I’m thrilled to show you around OptiMonk Experiments – a place to run controlled campaign A/B tests so that you can scale your campaigns with peace of mind, knowing what works best.
With OptiMonk Experiments, you can test any hypothesis that might come to your mind.
Perhaps you’re wondering which visitor segment provides the best performance: visitors from the US or visitors from Canada.
You may want to test if it’s better to use a popup or a sidemessage.
Or your visitors prefer gamification popups to standard list building forms.
You might want to test different offers against each other:
It’s critical to test these assumptions so that you can be absolutely sure that you’re using the most effective tactics and maximizing results.
To do that, you need a simple tool that allows you to run controlled experiments with your campaigns. Experiments like these, however, can easily get quite complicated and usually they require some tech skills to set them up. But not with OptiMonk!
We wanted to empower all marketers to run tests with a tech startup’s agility so we have made it incredibly simple.
You can add any existing campaign to a new experiment. Decide how you want to share your website traffic among the campaigns to be tested. Then run the experiment and wait for the results. It’s easy as that.
Happy experimenting!
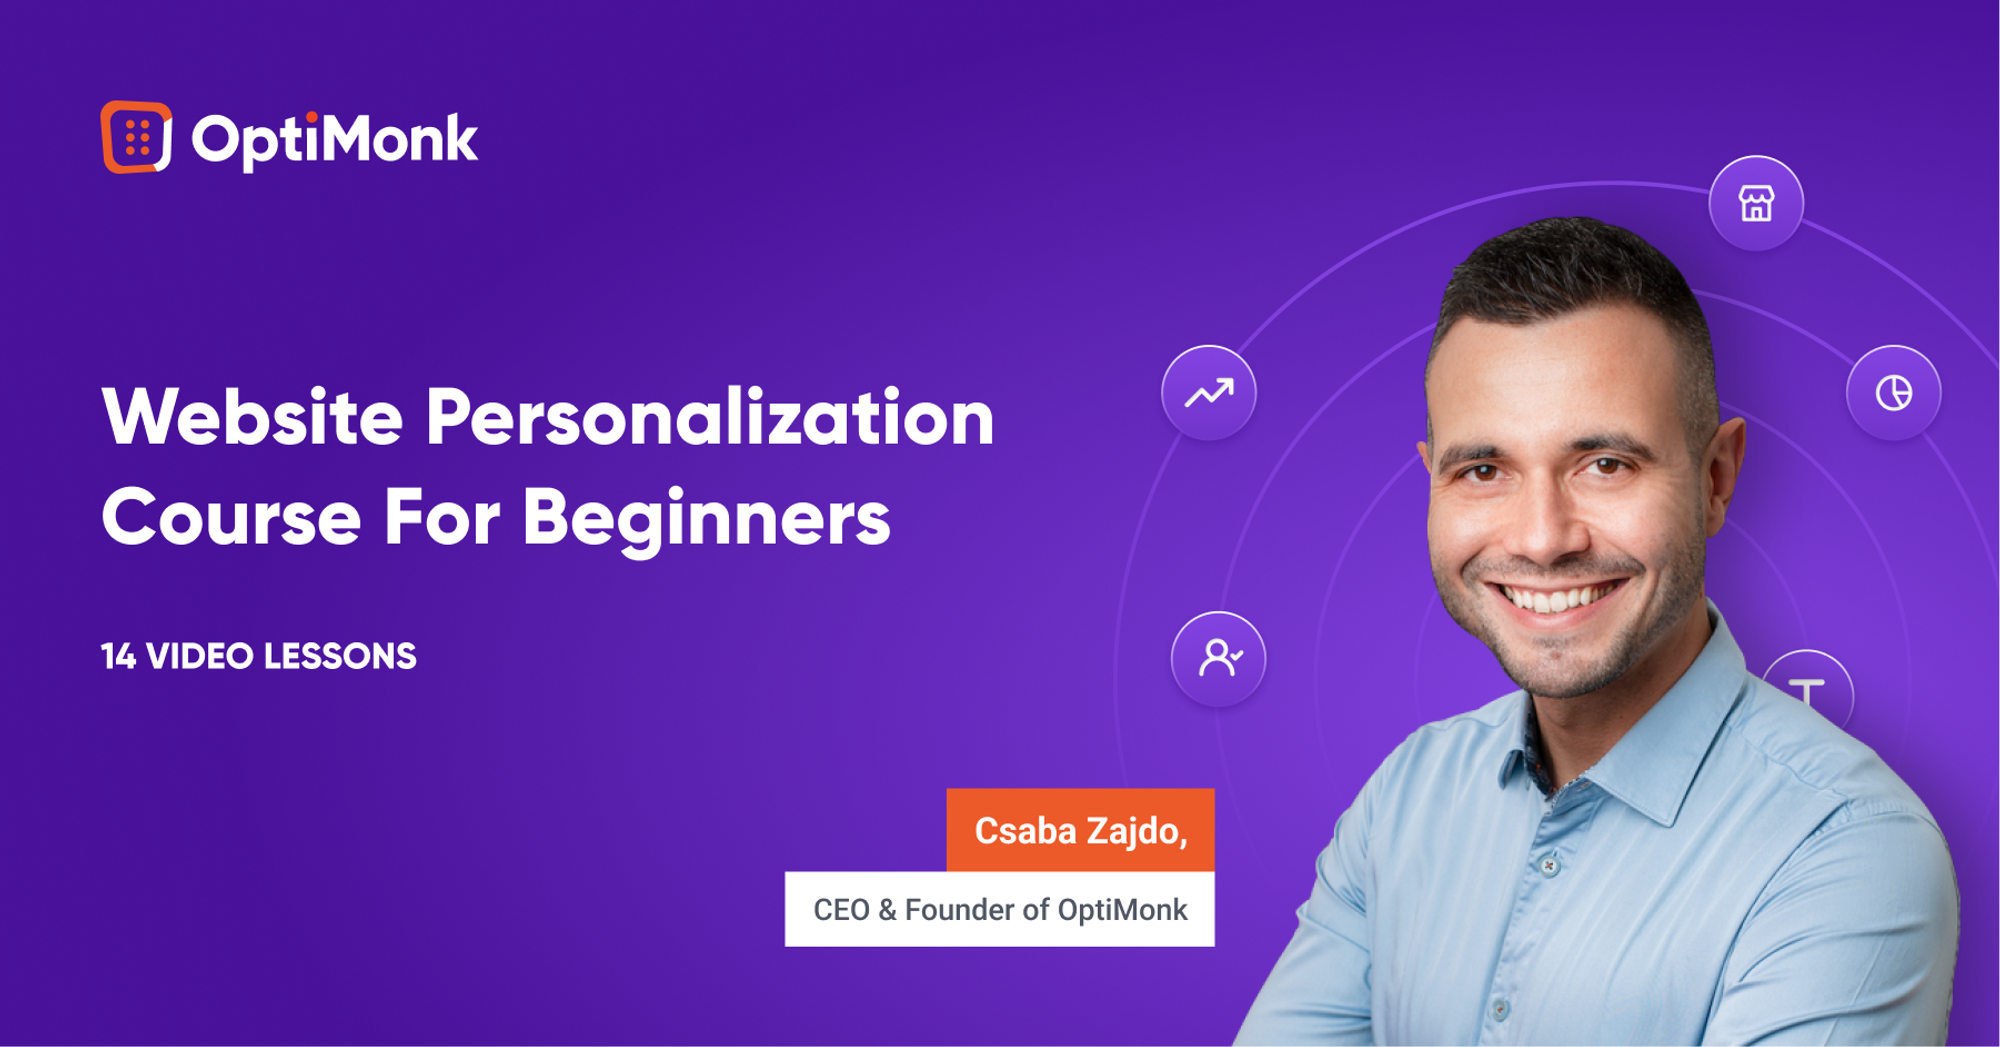
If you’ve rather take the next steps in your personalization journey self-paced, your best bet is our on-demand Personalization Course with our CEO & Founder, Csaba Zajdo. Learn the basics to kick off your web personalization journey and increase conversion rates with a proven website personalization strategy.
Hey, it’s Csaba, and welcome to the final module of OptiMonk’s website personalization course! Over the next lessons, we’ll talk about measuring the performance of your messages and optimizing them to achieve even better results. First, let’s dive into the question of how to evaluate whether your personalization efforts are effective. Let’s get right into it!
For any kind of marketing activity you undertake, there should be a measurable way of deciding whether or not the time and money you put into it were worth it. Measuring the results of personalization efforts is equally as important as measuring the ROI of a Facebook ad campaign.
So how do you go about it?
First of all, you need to decide what numbers you are going to use to measure success. These will be your KPIs or Key Performance Indicators.
You can choose to use any of the leading indicators, like click-throughs or signups (which are based on actions someone takes immediately upon seeing a personalized message), or lagging indicators like revenue or customer lifetime value (which can take some time to show up).
Depending on the nature of your personalization efforts, it can make sense to track your results using each of the KPIs just mentioned. But, you should also be aware that lagging indicators like revenue can be very misleading in some circumstances. For example, if you measure the performance of a signup form based on the extra revenue it generates, you can easily be led astray. Why? Because your store’s bottom line will be influenced by a great many different factors besides your personalized messages.
Once you’ve decided what to measure, you need to find the right tools to measure your KPIs.
For leading indicators like click-throughs and signups, the personalization platform you use will often provide a decent reporting and analytics system.
For more complex lagging indicators, you’ll probably need additional analytics solutions, such as Google Analytics.
But the problem here is that Google Analytics and similar tools are only able to measure anonymous visitor activity over the course of one session. That means you won’t be able to connect the dots between different, longer-term personalization campaigns.
That’s why having a personalization platform like OptiMonk makes sense. It keeps a complete overview of each customer’s journey from the very beginning to the end, which means you can attribute outcomes like revenue to personalized campaigns over longer periods. Thus, you’re able to measure the efficiency of even your most complex personalization efforts.
Given that you’re tracking the right KPIs with the right tools, how can you actually measure the extra revenue that your personalization efforts have generated? By running experiments, which are often called A/B tests.
When you A/B test a personalized message, you compare what actions two different groups of visitors take: the ones who are having a personalized experience, which is often called a test group, versus a group of visitors who only ever see a generic, non-personalized, version of your website, which is usually called the control group.
In the next lesson I’ll introduce you to the world of A/B testing, and teach you how to run successful experiments. I’ll see you in the next lesson!
Hey, it’s Csaba, and welcome back! In this lesson, we’re going to dive into A/B testing.
As discussed in the previous video, there’s no single perfect way to measure the effeciency of your personalization efforts. Nonetheless, A/B testing has proven to be the most time-tested way to scientifically and continuously improve your results.
At a high level, A/B testing—which is also known as split testing—is about splitting your visitors into two or more groups, showing different content to each group, and then measuring which group had more conversions and ended up reaching your chosen goal.
In the personalization world, you’ll usually have an assumption or idea for personalization that you want to test. It’s usually called a hypothesis.
Then, you go ahead and create your personalized message. In order to see if it works, you’ll split the segment you’re targeting in two: showing your new personalized content to one half (which we call the test group) and the previous version to the other half (which is often called the control group).
After you collect enough data about the performance of these two groups (which is usually called statistical significance), you can evaluate the results and decide whether your hypothesis was true or false.
If it was true, your personalized message will result in more conversions or revenue and you can be confident to run this new message variant to 100% of your target audience. If it was false and you’re not making any extra conversions or money, then you can just cancel it, and let the show continue as it was before you tried out your groundbreaking idea.
Running A/B tests is the surest way to victory. Why? Because you have a super-limited downside, but an unlimited upside.
If your hypothesis turns out to be false, then you can just simply stop the experiment. The only loss will be (at most) a couple of conversions among the test group who saw the new message during this short period of time. But if your personalization idea really does improve your conversion rate, then you can run it endlessly and let it create extra value for all eternity.
A/B testing is a great method to fine-tune and optimize your existing messages for the best possible results. You can just easily create new variants and test new offers, copy, and CTAs.
But A/B testing is also a great tool to make decisions about the legitimacy of your new ideas: just create a new A/B test, display this new message to only one-half of your audience, and simply compare the results.
This wraps up OptiMonk’s website personalization course. Everything you’ve learned in this course will help you to get started with website personalization and improve your conversion rates. Thank you for joining me and be sure to like, share, and subscribe for more actionable videos and courses.
I’ll see you in the next course!
You finished the course, and now you’re wondering what’s next? How to get started?
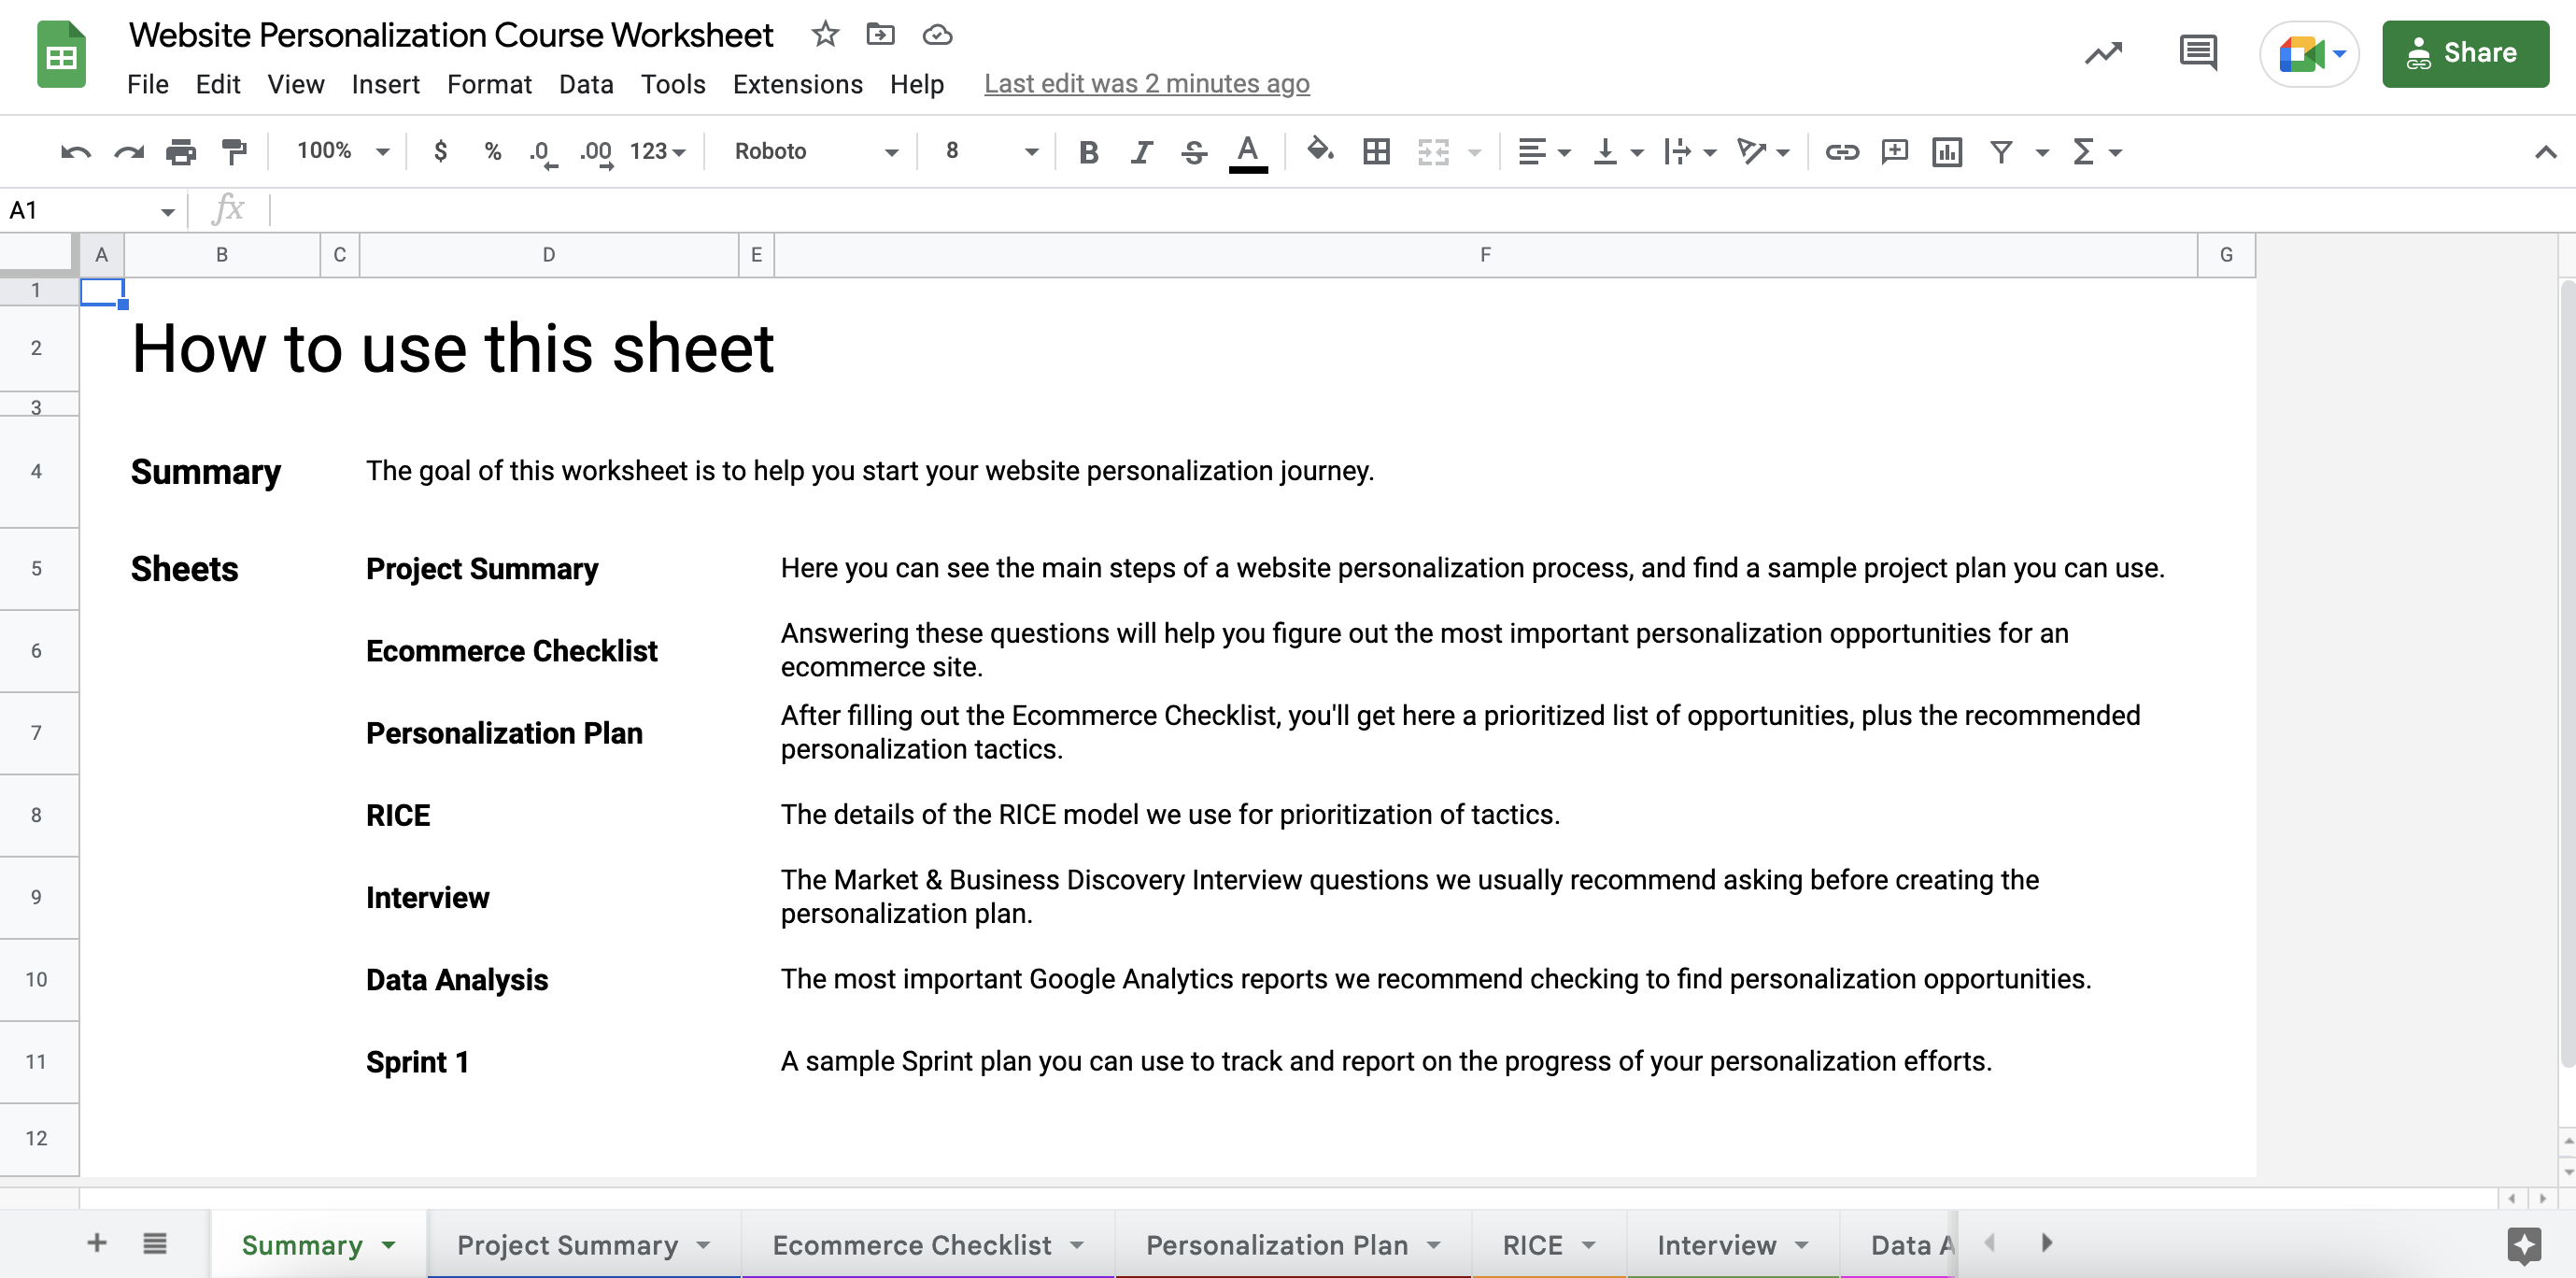
We get it, it can be intimidating. That’s why we created a Website Personalization Worksheet that gives you everything you need to get started with website personalization. Born from our experience with hundreds of successful ecommerce stores, it’s the most valuable website personalization resource you’ll find online.
How to use the worksheet?
STEP 2: Go to the Ecommerce Checklist sheet and answer all the questions by adding a checkmark to the “Yes” or “No” columns.
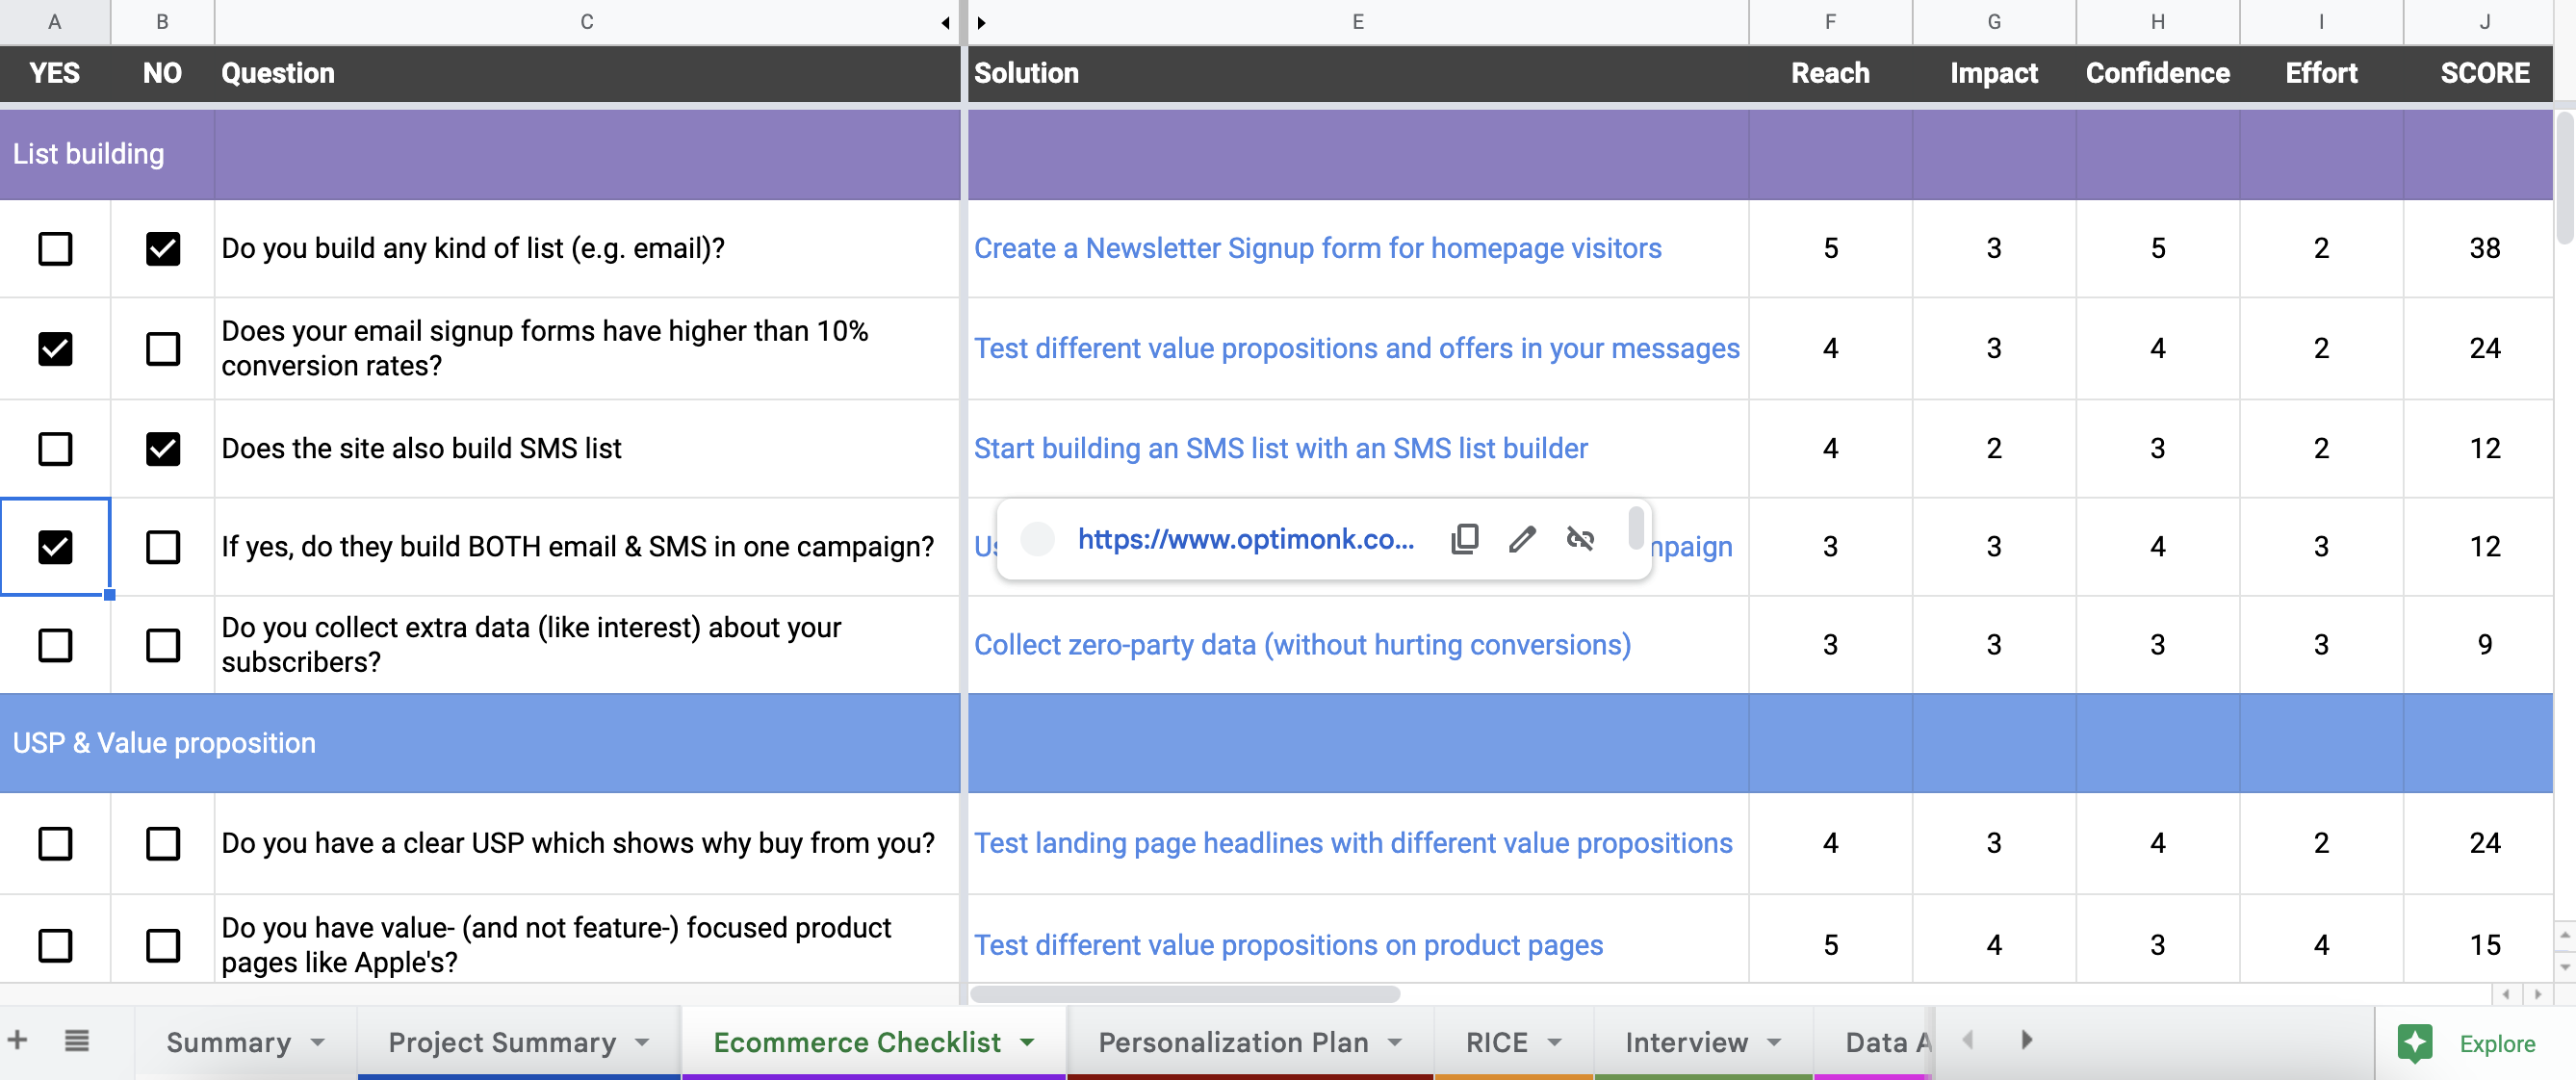
This will help you to uncover all the top personalization opportunities on your website.
STEP 3: Go to the Personalization Plan sheet. Based on your answers, here you’ll see an automatically ranked solution plan (using the RICE scoring method) with a recommended tactic for each opportunity.
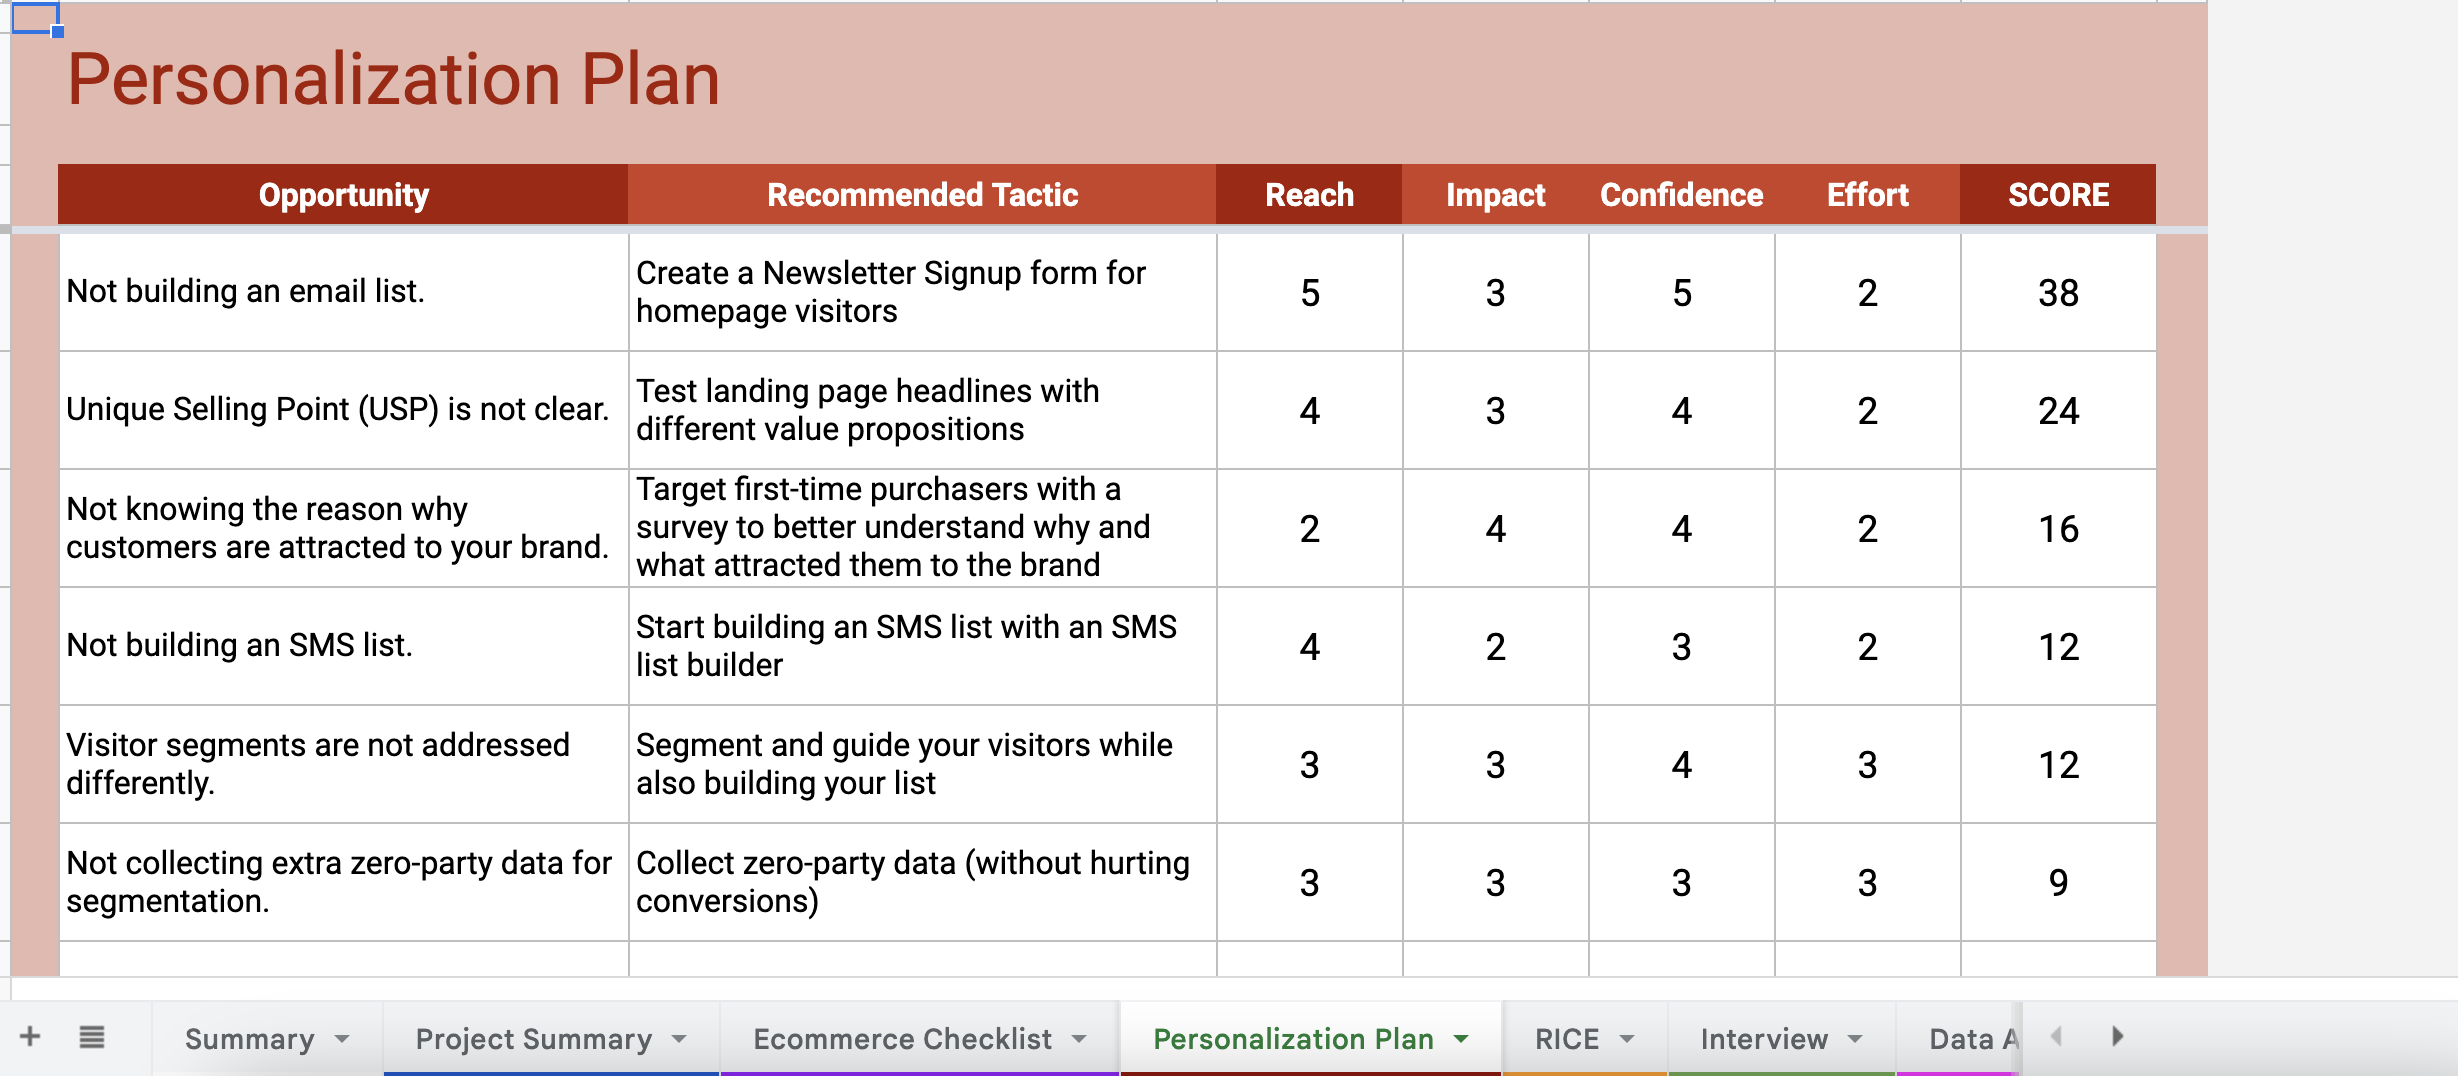
By hovering your cursor over the tactics, you’ll also see a link that gives you detailed guides on how to set up each tactic on your website.

From these links, you’ll be either redirected to a use case landing page full of ready-to-use templates (for basic tactics that are easy-to-setup), or you’ll be redirected to a step-by-step guide on how to set up the tactics (for more advanced tactics).
Besides this personalized plan, the worksheet also includes several useful tools, like a GANTT Chart, Sample Sprint Plan, Discovery Interview questions, and other tools to help you get started.
We hope the course and the worksheet together will help you to get started with web personalization and increase your conversion rates.
Good luck on your website personalization journey!
Get started now and turn traffic into sales!
Product updates: Introducing OptiMonk AI